
Skip the text and go straight to the gallery
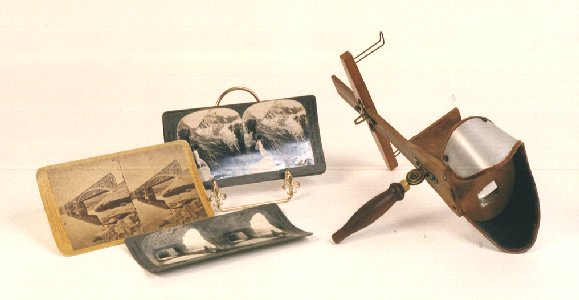
Stereo, or 3-D photography is almost as old as photography itself. Early stereographic equipment can be traced back as early as the 1830's, and the invention of the collectible Victorian-era stereoscope viewer is credited to Sir Oliver Wendell Holmes. Modern technology has made the production of stereographic images much simpler, and has enabled drastic improvements of the imagery as well.
The techniques I use to create my own images vary, depending on the subject and viewing technique I wish the audience to use. The one rule of thumb that always must be followed, however, is that both a left and a right image must be reproduced, so the brain can use its sense of parallax to compare two angles and perceive depth. For still-lifes I use a single camera, with its position shifted slightly to the right or left for the partner image. For any moving subject, two cameras must be used, and synchronized at an accuracy which is determined by the speed of movement of the subject. In some cases, two "point & shoot" cameras can be taped together, and the photographer can rely on a couple of quick index fingers. In others, an elaborate system of synchronized cable releases must be employed.
Viewing techniques are even more varied. My
personal favorite viewing method is by polarized projection, where both left and right
images are overlapped on a screen. 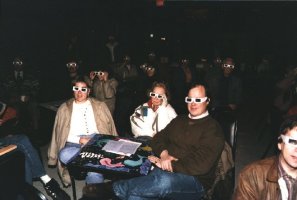 The images are polarized at 90-degree
angles of each other, and the viewer wears special polarized glasses which in turn block
the right image from the left eye, and the left image from the right eye. This is also the
most popular technique in current film-making. A viewing method popular in comic books and
1950s-era movies is the anaglyph technique, where the left and right images are determined
with red and blue tinting. The main drawback to this technique is that the final image can
only be seen in black & white, or very limited color.
The images are polarized at 90-degree
angles of each other, and the viewer wears special polarized glasses which in turn block
the right image from the left eye, and the left image from the right eye. This is also the
most popular technique in current film-making. A viewing method popular in comic books and
1950s-era movies is the anaglyph technique, where the left and right images are determined
with red and blue tinting. The main drawback to this technique is that the final image can
only be seen in black & white, or very limited color.
Most other popular viewing techniques are done via "side-by-side" viewing, either in a special viewer or, for the skilled stereo enthusiast, "free-viewing". Free-viewing can be done in one of two ways; one is the divergence method, in which the eyes are trained to focus beyond the real image, and focus instead on an imaginary spot beyond the "page". This is the technique used for looking at those posters that were wildly popular several years ago, and made famous by the folks at Magic Eye. The other method, sometimes considered easier among the uninitiated, is the cross-eyed technique. Either technique requires a bit of self-training, but can be accomplished by anyone with normal vision (corrected or not).
In order to see my images, you'll be required to use either the cross-eyed or the divergence method. To use the cross-eyed method, just focus on the end of your nose first, and slowly shift your vision outward until you blend the two images into one. For the divergence method, start with your focus beyond the image. If you've never done this before, you may want to practice on this image. It's a Single Image Random Dot Stereogram, a simpler version of those popular posters. Although (as its name implies) it is a single image, it can help develop the divergence skills required for other free-viewing. Gaze "through" the image, as if looking through a windshield with lots of bugs on it. When you get the divergence correct, the two dots at the top of the image will become three. Don't worry about whether or not it's working. When it does, you'll know it! Once you feel comfortable with this image, you're ready to move on to the photos! (If you really like these types of images, check out this site.) The photos may be a bit more difficult, because they will require more divergence, but with some effort and patience, the skill can be learned.